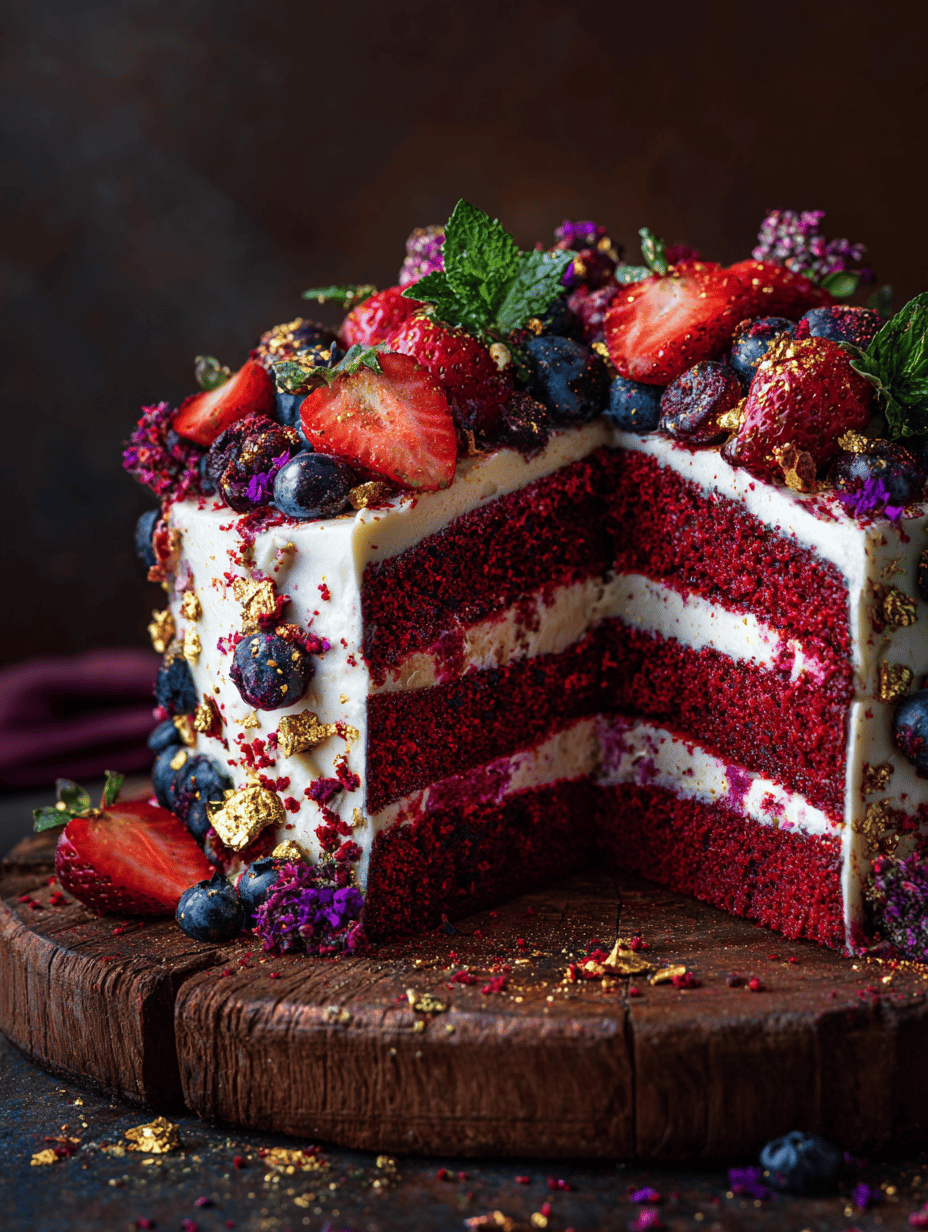
This isn’t your typical vanilla or chocolate cake. It’s a bold, unrestrained burst of color and flavor, born from a mix of tradition and a dash of chaos. The red velvet has a history of decadence and a touch of mystery—perfect for when you want to make an impression.
Baking it feels like a small act of rebellion; a splash of color in a world that often prefers neutral. The process is straightforward, but the results are visually stunning and full of texture. It’s a cake that demands attention, even before the first bite.
Why I keep turning to this cake
Its unpredictable color and moist crumb make every baking session feel like an act of rebellion. The slight chaos in mixing and the vivid result remind me that beauty often lies in imperfection. Plus, the reactions when I cut into it—eyes lighting up—are worth every effort.
Breaking down the blood: ingredients & their roles
- All-purpose flour: Gives structure and body. Skip or swap for cake flour for a lighter crumb.
- Red food coloring: Creates that iconic blood-red hue. Use gel for deeper color without watering down the batter.
- Buttermilk: Adds tang and moisture. If you’re out, sour milk or yogurt works.
- Cocoa powder: A whisper of chocolate, balancing the sweetness. Use Dutch-processed for a smoother flavor.
- Vinegar: React with baking soda to lift the cake. Apple cider vinegar works if you want a fruitier note.
- Vegetable oil: Keeps it moist and tender. Olive oil can add a subtle flavor twist.
- Sugar: Sweetens and tenderizes. Brown sugar adds a caramel note, if you like.
Tools of the chaos: equipment for red velvet
- Mixing bowls: For combining dry and wet ingredients, ensuring even mixing.
- Sifter: To aerate dry ingredients and remove lumps, making the batter smooth.
- Electric mixer or whisk: To blend ingredients thoroughly and achieve a uniform batter.
- Cake pan (23cm round): To shape the cake evenly for uniform baking.
- Cooling rack: To cool the cake evenly and prevent sogginess.
Step-by-step to a bloody good velvet
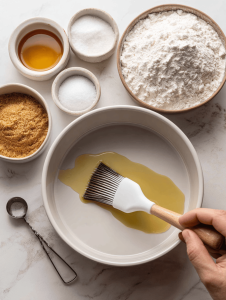
Step 1: Preheat your oven to 180°C (350°F). Grease and flour a 23cm (9-inch) round cake pan, lining the bottom with parchment.
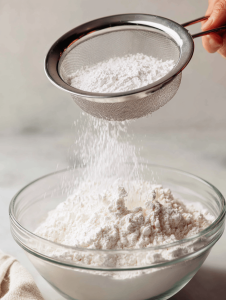
Step 2: In a large bowl, sift together 2 1/2 cups of all-purpose flour, 1 1/2 cups of sugar, 1 teaspoon of baking soda, and 1/2 teaspoon of salt.
Step 3: In a separate bowl, whisk together 1 cup of vegetable oil, 1 cup of buttermilk, 2 large eggs, and 1 tablespoon of white vinegar.
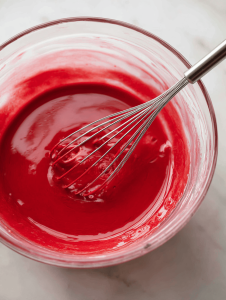
Step 4: Add a few drops of red food coloring to the wet ingredients—aim for a deep, blood-red hue. Mix until well combined.
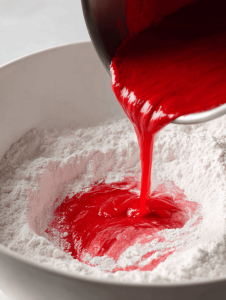
Step 5: Gradually pour the wet mixture into the dry ingredients, folding gently until just combined. The batter should be smooth and a little bubbly.
Step 6: Pour the batter into your prepared pan. Smooth the top with a spatula. Bake for 30-35 minutes, until a toothpick inserted in the center comes out clean.
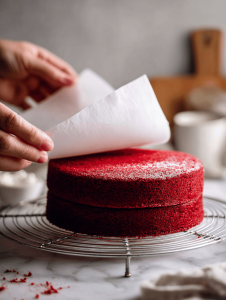
Step 7: Let the cake cool in the pan for 10 minutes, then turn out onto a wire rack. Cool completely before frosting.
Key checkpoints for a perfect bloody red velvet
- Cake edges should be slightly pull away from the pan, golden-bink color.
- The top should crack lightly, indicating the right structure.
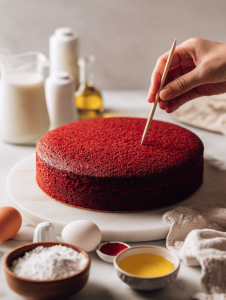
- A toothpick inserted in the center should come out clean, not wet.
- The cake feels firm but springy to the touch, not dense or soggy.
Common mishaps and how to fix them
- Undercooked or overbaked cake.? IF THE CAKE COLLAPSES IN THE MIDDLE, CHECK YOUR OVEN TEMP—overbaking can cause sinking.
- Uneven color distribution.? IF THE COLOR LOOKS uneven, add a few more drops of food coloring and mix again.
- Runny frosting.? IF THE frosting is too runny, add more powdered sugar a tablespoon at a time.
- Burnt edges.? IF THE CAKE edges are burnt, lower the oven temp by 10°C (20°F) and bake longer.
Blood-Red Velvet Cake
Ingredients
Equipment
Method
- Preheat your oven to 180°C (350°F). Grease a 23cm round cake pan and line the bottom with parchment paper, then set aside.
- Sift together the flour, sugar, baking soda, and salt in a large bowl until well combined. This aerates the dry ingredients and removes lumps, ensuring a smooth batter.
- In a separate bowl, whisk together the oil, buttermilk, eggs, and vinegar until smooth and slightly frothy. The mixture should look uniform and slightly glossy.
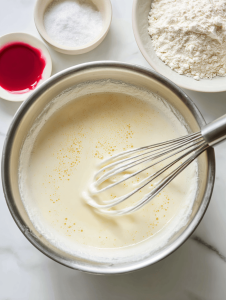
- Add a few drops of red food coloring to the wet mixture, aiming for a deep, blood-red hue. Mix thoroughly until the color is evenly distributed and vibrant.
- Pour the wet mixture into the dry ingredients. Gently fold them together with a spatula or spoon until just combined. The batter should be smooth, slightly bubbly, and pourable without lumps.
- Pour the batter into your prepared cake pan, smoothing the top with a spatula for an even surface. Tap the pan lightly on the counter to release any air bubbles.

- Bake in the preheated oven for 30-35 minutes, until the edges are golden and the top cracks lightly. Insert a toothpick into the center; it should come out clean.
- Remove the cake from the oven and let it cool in the pan for about 10 minutes until slightly firm and easier to handle.
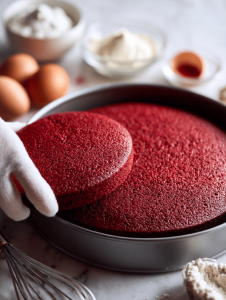
- Turn the cake out onto a wire rack and peel away the parchment paper. Cool completely until the cake feels firm to touch and no warmth remains.
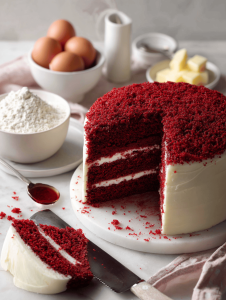
- Once cooled, slice to reveal the vibrant blood-red crumb. Serve as is or with your favorite frosting for a dramatic presentation.
Hi, I’m Jessica Miller, the creator behind Taste Bud Tyrant. Before you get intimidated by the name, let me explain. I am not actually tyrannical. I am just deeply opinionated about flavor. If a dish is bland, I will say it. If a sauce needs acid, I will add it. If something can be bolder, brighter, or better balanced, I will not stop until it is.
