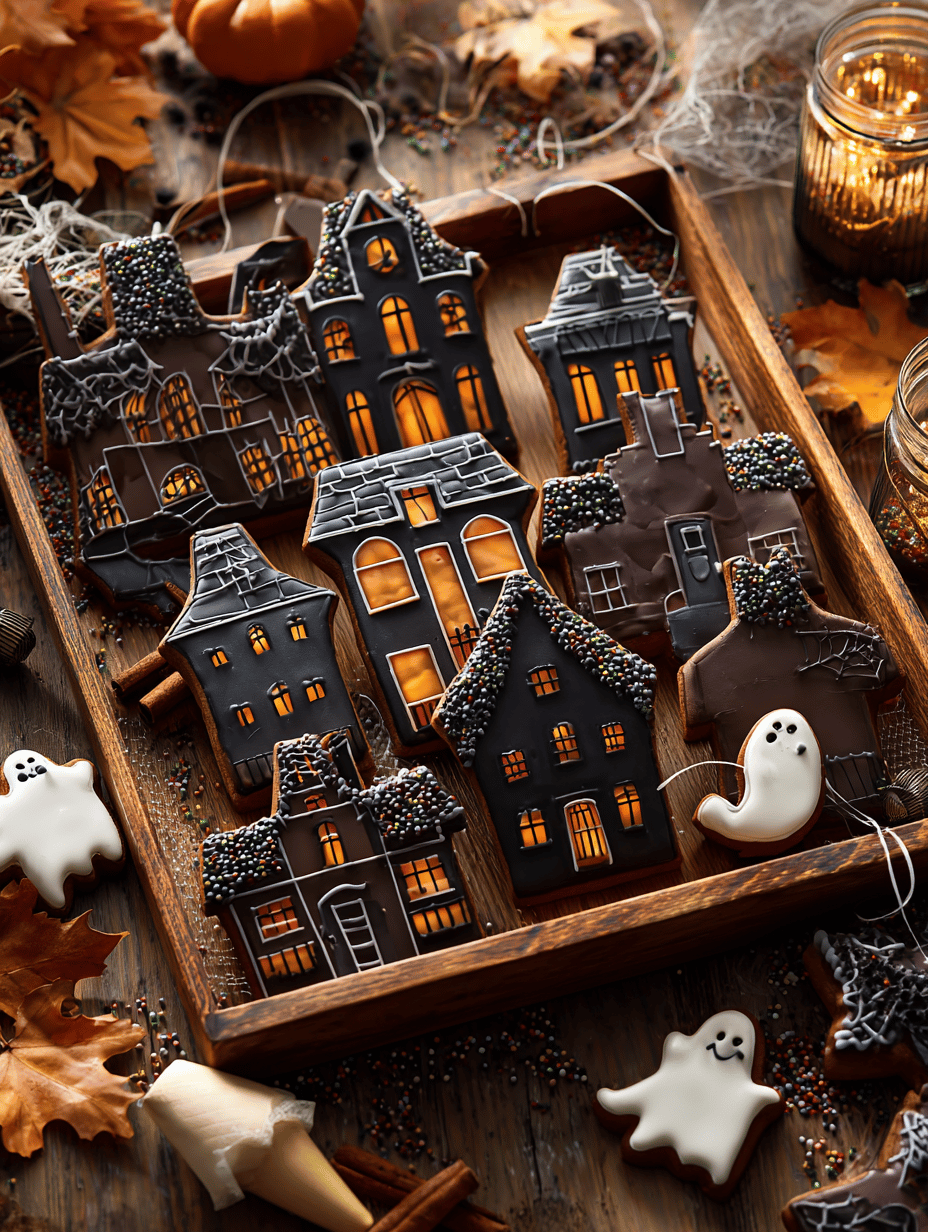
Baking haunted house cookies feels like conjuring magic from a simple mix of flour and sugar. There’s a certain thrill in turning plain dough into eerie, whimsical shapes that evoke childhood memories and spooky stories. This recipe is a little chaotic—expect some cracked edges and crooked faces, but that’s part of its charm. It’s about the messy, joyful process of creating something that’s as fun to look at as it is to eat.
Why I Keep Coming Back to These Cookies
They’re imperfect, chaotic, and full of nostalgic chaos. The process is messy, loud, and full of laughs, but seeing those spooky shapes come together keeps me coming back. Plus, decorating with kids or friends adds a layer of joyful chaos I cherish. These cookies remind me that sometimes, the best treats are made with a little wildness and a lot of love.
Ingredient Breakdown & Tips
- Butter: Creamy and rich, gives cookies a tender crumb. Use unsalted for control, or salted for a savory contrast.
- Sugar: Sweet and helps with browning. Brown sugar adds chewiness, white keeps it crisp.
- Eggs: Bind ingredients and add moisture. Room temp helps everything blend smoothly.
- Flour: Structure builder. All-purpose is best, but a touch of rye or whole wheat works too.
- Food coloring: Creates spooky effects. Gel colors are intense without thinning dough.
- Royal icing: For decorating spooky faces. Set it aside for at least 30 min to firm up.
- Vanilla extract: Adds warmth and depth. Use pure vanilla for best flavor.
Tools and Equipment for Haunted House Cookies
- Mixing bowls: Gather ingredients and mix dough.
- Electric mixer: Cream butter and sugar efficiently.
- Baking sheets: Bake cookies evenly.
- Parchment paper: Prevent sticking and easy cleanup.
- Cookie cutters or knives: Shape spooky figures.
- Food coloring: Tint dough for creepy effects.
- Decorating tips and brushes: Add spooky details with icing.
Step-by-Step Guide to Crafting Haunted House Cookies
Step 1: Preheat your oven to 180°C (350°F).
Step 2: Line baking sheets with parchment paper.
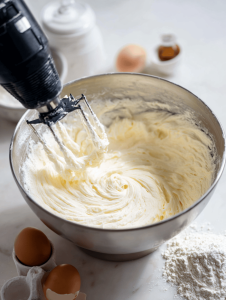
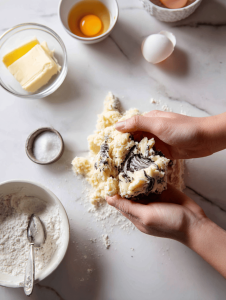
Step 3: Cream softened butter with sugar until light and fluffy, about 3-4 minutes.
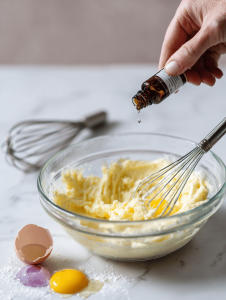
Step 4: Mix in eggs one at a time, then stir in vanilla extract.
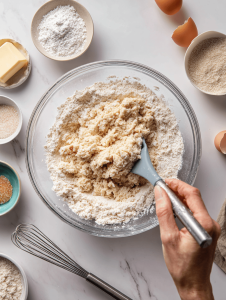
Step 5: In a separate bowl, whisk together flour, baking soda, and a pinch of salt.
Step 6: Gradually add dry ingredients to the wet, mixing just until combined.
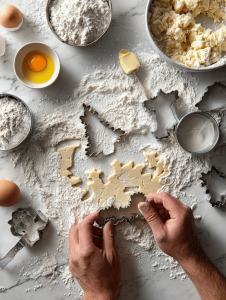
Step 7: For the haunted effect, divide dough and tint portions with black or dark food coloring.
Step 8: Shape dough into eerie shapes—ghosts, bats, or crooked pumpkins.
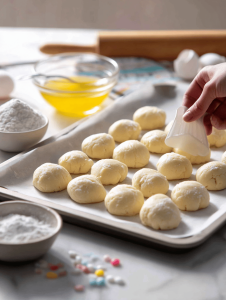
Step 9: Place on prepared baking sheets, leaving space for spreading.
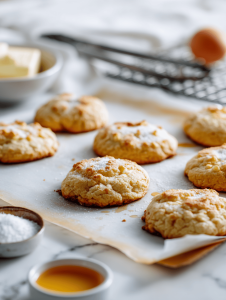
Step 10: Bake for 10-12 minutes until edges are golden and slightly crisp.
Step 11: Allow cookies to cool on a rack before decorating.
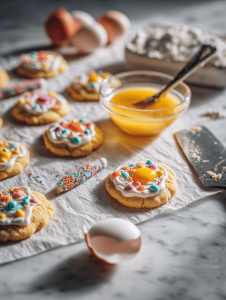
Step 12: Use royal icing or melted chocolate to add spooky faces or creepy details.
Step 13: Let decorated cookies set for at least 30 minutes before serving.
Cooking Checkpoints & Tips for Haunted House Cookies
- Edges should be golden brown, not burnt, for perfect crunch.
- Faint vanilla smell when dough is ready for chilling.
- Cookie shapes should hold when baked, not spread too thin.
- Decorations set firmly, not sticky, before handling or stacking.
Common Mistakes & How to Fix Them
- Dough is too soft and spreads during baking.? FORGOT to chill dough — Chill for at least 30 minutes to prevent spreading.
- Cookies are dense and dry.? DUMPED too much flour — Use just enough to handle comfortably.
- Cookies turn dark too quickly.? OVER-TORCHED edges — Reduce baking time or lower oven temp slightly.
- Decorations melt or slide off.? MISSED decorating details — Wait until cookies cool completely before decorating.
Haunted House Cookies
Ingredients
Equipment
Method
- Begin by preheating your oven to 180°C (350°F). Line baking sheets with parchment paper for easy cleanup.

- In a large mixing bowl, beat softened butter and sugar together with an electric mixer until the mixture is light, fluffy, and creamy, about 3-4 minutes. You’ll notice it turns pale and slightly increases in volume.
- Crack in the egg and beat until fully incorporated, then add vanilla extract and mix again until smooth and fragrant.
- In a separate bowl, whisk together flour, baking soda, and salt. Gradually add this dry mixture to the wet ingredients, mixing on low speed or folding just until the dough comes together and is slightly sticky but manageable.
- Divide the dough into portions. Tint some with black or dark food coloring to create spooky effects, kneading gently until the color is evenly distributed.
- On a floured surface or using cookie cutters, shape the dough into eerie figures like ghosts, bats, or crooked pumpkins. Let your imagination run wild—rough edges and crooked faces add charm!
- Place the shaped dough onto the prepared baking sheets, leaving enough space between each piece to accommodate spreading during baking.
- Bake in the preheated oven for 10-12 minutes, or until the edges are golden brown and slightly crisp. The smell of baking cookies will fill the kitchen!
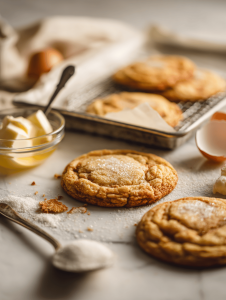
- Remove the cookies from the oven and allow them to cool on the baking sheet for a few minutes before transferring to a wire rack. They will firm up as they cool.
- Once completely cooled, decorate your spooky cookies with royal icing or melted chocolate to add faces, eyes, and creepy details. Use decorating tips or brushes for precision.

- Let the decorated cookies set for at least 30 minutes, allowing the icing to firm up. Then, enjoy these imperfect, chaotic, and adorable haunted house cookies with friends and family!
Notes
Hi, I’m Jessica Miller, the creator behind Taste Bud Tyrant. Before you get intimidated by the name, let me explain. I am not actually tyrannical. I am just deeply opinionated about flavor. If a dish is bland, I will say it. If a sauce needs acid, I will add it. If something can be bolder, brighter, or better balanced, I will not stop until it is.
