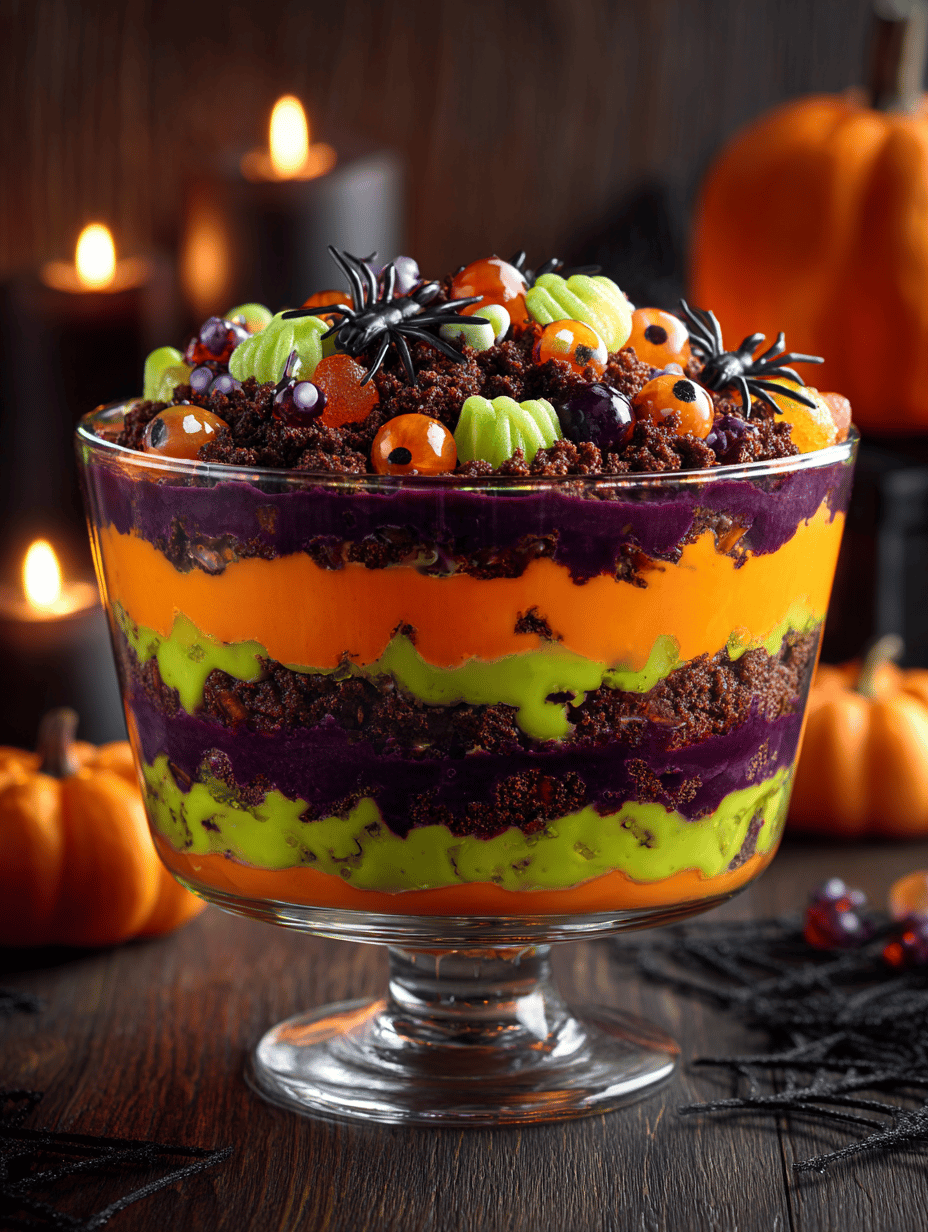
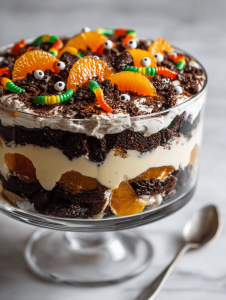
When I think of Halloween desserts, I want something that’s as fun to make as it is to eat. This trifle does just that—layers of spooky, colorful ingredients that come together in a chaotic, delightful way. It’s perfect for parties when you want to impress but also keep things relaxed.
Why I Keep Coming Back to This Halloween Trifle
Every time I make it, I love how chaotic and cheerful it looks. It’s imperfect, colorful, and fun—a reminder that dessert doesn’t need to be neat, just tasty and joyful. Plus, it’s surprisingly forgiving, making it accessible even on a busy night.
Layer by Layer: Ingredient Insights
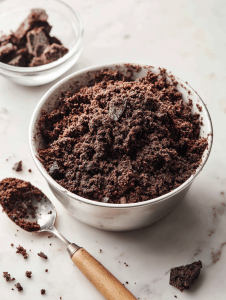
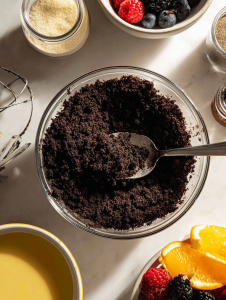
- Chocolate Cake or Cookies: Provides a rich, crumbly base that contrasts with creamy layers. Swap for gingerbread for a holiday twist.
- Pudding or Custard: Creamy, smooth, with a hint of vanilla or spice. Use dairy-free alternatives if needed.
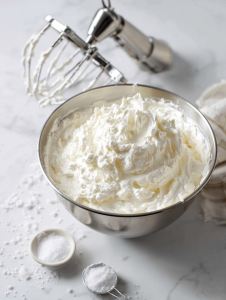
- Whipped Cream: Light, airy topping; adds a fluffy texture. Stabilize with gelatin or cornstarch if needed.
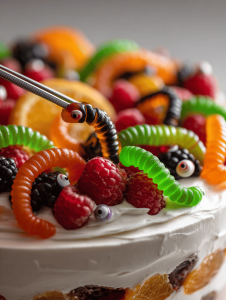
- Gummy Worms or Candy Eyes: Add a spooky, playful visual element. Use sour worms for extra tang.
- Fruits (like berries or orange slices): Bright, fresh bursts of flavor. Skip if you prefer a more chocolate-heavy dessert.
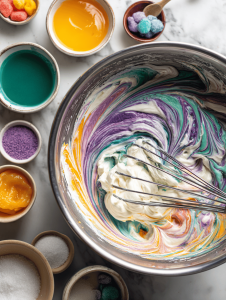
- Food Coloring or Gel Icing: Create vibrant, Halloween-themed layers. Use sparingly for vivid effects.
- Candy or Chocolate Decorations: Finish with themed details that make the dessert pop.
Tools of the Trade for a Spooky Good Trifle
- Large Glass Bowl or Trifle Dish: Show off the layers and keep everything visible.
- Mixing Bowls: Prepare different components separately.
- Whisk or Electric Mixer: Beat creams and mixes smoothly.
- Spatula: Layer ingredients evenly without disturbing layers.
- Spoon or Ladle: Carefully transfer layers into the dish.
Crafting the Perfect Halloween Trifle: Step-by-Step
Step 1: Start by gathering your ingredients and equipment. Prepping everything makes assembly smoother.
Step 2: Layer the ingredients carefully, creating a visual contrast that’s as fun to look at as it is to eat.
Step 3: Chill the assembled trifle for at least 2 hours, letting flavors mingle and textures set.
Step 4: Finish with a spooky garnish—perhaps gummy worms or candy eyes—and serve chilled.
Key Tricks for a Spooktacular Trifle
- Ensure each layer is even for a balanced look and taste.
- Use chilled ingredients to help the layers set and hold.
- Keep an eye on the color contrast—bright layers pop visually.
- Test the firmness of the top layer—should be jiggly but not runny.
Common Pitfalls and How to Dodge Them
- Layers slide or mix together.? FORGOT to chill layers before assembling? Chill each component separately for at least 30 minutes.
- Soggy, unappetizing layers.? DUMPED too much liquid on the sponge? Use a light hand and soak just enough to moisten.
- Runny or grainy topping.? OVER-TORCHED the whipped cream? Keep it at medium-high speed and watch closely.
- Disorganized, messy layers.? MISSED the final chill step? Let the trifle sit for at least 2 hours to set.
Halloween Spooky Trifle
Ingredients
Equipment
Method
- Begin by gathering all your ingredients and equipment. Crumble the chocolate cake or cookies into bite-sized pieces and set aside.
- In a mixing bowl, whip the heavy cream with sugar and vanilla extract using a whisk or electric mixer until soft peaks form and it becomes light and fluffy.
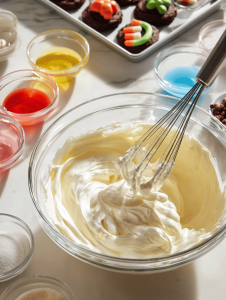
- Using a spatula, gently fold the whipped cream into the chilled pudding until well combined and smooth.
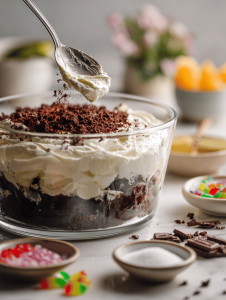
- Start layering your trifle by adding a generous spoonful of cake crumbs at the bottom of the glass dish.
- Spread a layer of the creamy pudding mixture over the cake crumbs, creating a colorful contrast.

- Repeat the layers — cake crumbs, pudding, and whipped cream — until the dish is filled, ending with a layer of whipped cream on top.
- Use food coloring or gel icing to tint portions of the whipped cream or pudding for vibrant, spooky layers. Swirl in colors for a chaotic look.
- Decorate the top with gummy worms, placing them so they look like they’re crawling out of the trifle, and add candy eyes for a spooky effect. Scatter berries or orange slices if using.
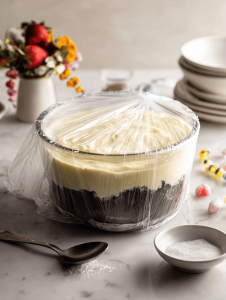
- Cover the dish with plastic wrap and chill in the refrigerator for at least 2 hours to let the flavors meld and the layers set.
- Once chilled, remove from the fridge, add any final spooky decorations, and serve chilled to your eager guests.
Notes
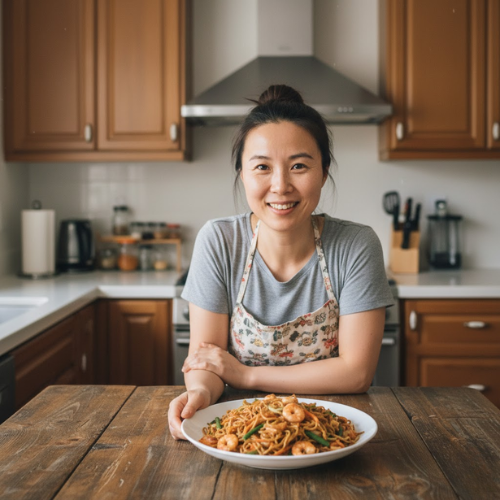
Hi, I’m Jessica Miller, the creator behind Taste Bud Tyrant. Before you get intimidated by the name, let me explain. I am not actually tyrannical. I am just deeply opinionated about flavor. If a dish is bland, I will say it. If a sauce needs acid, I will add it. If something can be bolder, brighter, or better balanced, I will not stop until it is.
